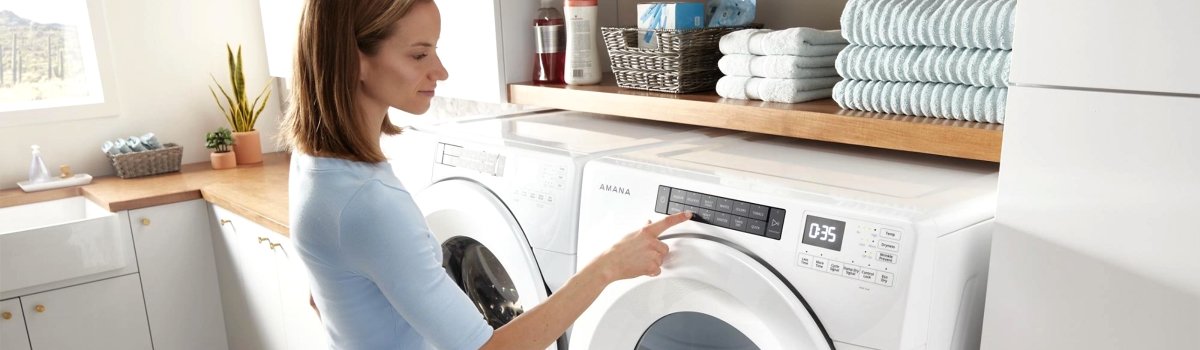
When your Amana dryer suddenly flashes something like F1 E1, F3 E2, F4 E3 or any other F# E# combination, it’s basically talking to you in its own language. Those “F” and “E” codes point toward real issues inside the machine: control electronics, sensors, heating system, airflow, or the door switch.
Once you understand the basic logic behind these codes, troubleshooting stops being guesswork. You know what kind of problem you’re dealing with, what you can safely try yourself at home, and what should be left to a professional technician. This guide is written in simple, everyday American English so any homeowner can follow it, even without technical experience.
You’ll get a clear overview of how the F# E# system works, plus detailed explanations for the most common codes, with causes, DIY steps, and preventative tips.
Why Your Amana Dryer Shows F# E# Codes
Modern Amana dryers use sensors and electronic controls to monitor what’s happening inside the machine. When something doesn’t look normal, the control board throws an error instead of silently continuing to run with a serious problem.
A few examples of what these codes are trying to protect you from:
- Overheating because of a clogged vent
- Running with a faulty temperature or moisture sensor
- Operating while the door switch doesn’t confirm that the door is fully closed
- Heating when the control board can’t safely manage the heater circuit
So when you see an F# E# code, it’s not just “the dryer being annoying.” It’s trying to keep you and the appliance safe, and also make diagnosis faster.
How the F and E Parts of the Code Work
On Amana dryers, error messages usually look like “F” plus a number, then “E” plus another number. You can think of it like a street and house number.
In very simple terms:
- F = the main system or function group (control, sensing, heating, airflow, door, etc.)
- The number after F = which group is affected
- E = specific error
- The number after E = what kind of problem the control sees inside that group
Common examples you might see:
- F1 E1 – main control board fault
- F2 E1 – stuck or shorted button on the control panel
- F3 E1 – exhaust temperature sensor (thermistor) problem
- F3 E2 – moisture sensor problem
- F4 E1 – heater circuit issue
- F4 E3 – restricted airflow / vent problem
- F5 E1 or F5 E2 – door switch or latch issue
You don’t need to memorize all of them. The idea is to recognize whether the problem is likely about electronics, sensors, airflow, or the door, and then act accordingly.
First Things To Do Before You Chase Any Error Code
Before you dive into specific codes and start taking anything apart, it’s smart to walk through a few simple steps. Many strange error codes come from things you can fix in a couple of minutes.
Start with safety and a soft reset:
- Disconnect power. Unplug the dryer or flip the breaker off before you touch any wiring, panels, or internal parts.
- Let the dryer cool down. If the machine just finished a hot cycle, wait until the drum and inside feel cool.
- Reset the control. After a few minutes with no power, plug it back in or flip the breaker on. Run a short timed-dry test with an empty drum.
At the same time, check the basics:
Clean the lint screen, make sure the vent hose behind the dryer isn’t crushed or sharply kinked, and confirm that the door closes normally and latches with a solid “click.”
If a code appears instantly when you press Start, it usually points toward the control board, console, or door switch. If it appears after the dryer has been running for a bit, it’s more likely tied to temperature, moisture, heating, or airflow.
F1 E1 – Main Control Board Fault
F1 E1 usually means the dryer is unhappy with its “brain” – the main electronic control board. This board manages everything: motor, heater, sensors, and user interface.
How the problem looks in real life:
The dryer might light up but refuse to start a cycle. The display can show F1 E1 almost immediately. In some cases, the dryer may stop mid-cycle and then show the code the next time you try to run it.
Why this failure happens:
Power surges, unstable voltage, age, moisture near the console, or internal component failure on the board can all trigger F1 E1. Sometimes a loose connector at the control board can also cause strange behavior and codes.
What you can realistically try at home:
Start with a proper reset. Turn off the breaker or unplug the dryer for 5–10 minutes, then restore power and try a simple timed-dry cycle with an empty drum.
If the code never comes back, it may have been a one-time glitch. If F1 E1 appears again right away, especially before the drum even starts turning, that usually points to a true control board problem that requires professional diagnosis and board replacement.
Preventative tips:
Keep the laundry area dry, avoid steam blasting the console, and use a properly grounded outlet. If your home regularly has power issues, a surge protector rated for large appliances can help protect the board.
F2 E1 – Stuck Or Shorted Button On The Console
F2 E1 is basically the dryer saying, “One of my buttons looks like it’s stuck.” The control expects buttons to be pressed and released. When it sees one “always on,” it throws an error.
What this failure looks like:
The panel may beep randomly or ignore your inputs. Some buttons might feel dead, or the dryer may show F2 E1 as soon as you try to change a setting or start a load.
Why it happens:
A physically jammed button, cleaner or liquid that got into the console, repeated heavy pressing, or age-related wear in the keypad can all cause a stuck-key condition. In some cases, the user interface board itself fails.
What you can try yourself:
Gently press every button on the panel and feel for one that doesn’t click properly, feels mushy, or seems sunken in. Clean the console with a soft, slightly damp cloth and dry it thoroughly. Always spray cleaner onto the cloth, not directly on the panel.
If the same code continues after cleaning and resetting, the keypad or user interface board is likely failing and may need to be replaced. That’s usually a job for someone comfortable working inside the console.
F3 E1 – Exhaust Thermistor (Temperature Sensor) Issue
The exhaust thermistor is a small sensor that tells the dryer how hot the outgoing air is. If that sensor reading goes way out of range, the control no longer trusts it and throws F3 E1.
How it shows up during use:
The dryer may start a cycle and then shut down with the code after a few minutes. Sometimes it will run but give very inconsistent drying: too hot one time, too cool the next.
What usually causes it:
- A failed thermistor (open or shorted)
- Loose, corroded, or damaged wiring between the sensor and the control
- Severe airflow restriction that makes the exhaust temperature spike or behave strangely
What you can do at home:
Focus on airflow first, because a clogged vent can push temperatures out of the normal range. Clean the lint screen, check the vent hose behind the dryer for kinks or crushing, and make sure the outside vent hood opens freely when the dryer runs.
If you are confident working around the back panel (with the power disconnected), you can visually inspect the thermistor area for obviously loose plugs, broken wires, or burnt spots. But electrical testing of the sensor and wiring is best left to someone with the right tools and experience.
Preventative advice:
Good airflow is everything. Keep the vent line clean, avoid extremely long vent runs with lots of sharp turns, and don’t ignore slow-drying loads, because they often signal airflow problems long before the code appears.
F3 E2 – Moisture Sensor Not Reading Clothes
Many Amana dryers use metal sensor bars inside the drum to “feel” how damp the clothes are. F3 E2 usually means the dryer doesn’t like what it’s seeing from the moisture sensor.
What you might notice:
Sensor-dry cycles end too early and leave clothes damp, or the dryer behaves like everything is dry even when it isn’t. The code can appear after several loads where the sensor readings don’t make sense to the control.
Why this happens:
The most common reason is build-up on the sensor bars from dryer sheets and fabric softener. That waxy film blocks proper contact with the clothes. Less commonly, wiring damage or a failed sensor circuit can cause the issue.
DIY fix that often works:
Find the metal moisture sensor bars inside the drum, usually near the lint filter opening. Use a soft cloth with a little mild dish soap or white vinegar to scrub them. Wipe away any residue with a damp cloth and then dry them.
After cleaning, run a medium-size load on a sensor-dry cycle and see if the performance improves. If F3 E2 keeps coming back even after the bars are clean, the problem may be in the wiring or control and may require a technician.
Long-term prevention:
Avoid using multiple dryer sheets in each load, clean the sensor bars every now and then, and don’t overload the drum so clothes can actually touch the sensors.
F4 E1 – Heater Circuit Problem
When the dryer can’t control or detect its heater circuit properly, it can throw F4 E1. This usually points toward the heating element, heater relay, or related wiring.
How the failure feels:
The drum turns but you get no heat. Loads take much longer to dry, no matter the setting. The code may appear shortly after the dryer tries to start heating.
Why this kind of fault shows up:
- Failed heating element (broken coil)
- Damaged or loose wiring to the heater
- Heater relay issues on the control board
- In gas models, ignition or valve problems that prevent proper heating
What a homeowner can check:
Verify that the dryer has proper power. On many electric dryers, one half of the 240-volt supply can trip, leaving the drum running but the heater cold. Check your breakers and reset them fully if needed.
Look at the power cord and outlet for clear signs of heat damage or burning. If you’re very comfortable with DIY and safety, you can unplug the dryer, remove the back panel, and visually inspect the heating element housing for broken coils or burnt connectors.
But because the heater circuit handles high current and temperature, deeper testing and replacement are usually best handled by a professional technician.
F4 E3 – Restricted Airflow and Vent Issues
F4 E3 is one of the most common and most “DIY-friendly” errors. It means your dryer is having trouble moving air out of the machine. Poor airflow can trigger overheating, long dry times, and this code.
Real-world signs of restricted airflow:
- Clothes take longer and longer to dry, even on high heat
- The outside vent hood barely blows air or the flap hardly opens during a cycle
- The top or sides of the dryer feel hotter than normal after a load
Typical causes:
- Lint buildup in the lint screen, vent hose, or wall duct
- A vent hose that is crushed behind the dryer or has sharp, tight bends
- An outside vent hood that’s jammed, painted shut, or blocked by nests or debris
What you should do at home:
Clean the lint screen thoroughly. If you use dryer sheets, wash the screen with warm water and a bit of dish soap to remove invisible film, then dry it.
Pull the dryer gently away from the wall and inspect the vent hose. Straighten out sharp bends, shorten extra length if possible, and make sure it’s not flattened when you push the dryer back.
Disconnect the vent hose from both the dryer and the wall. Vacuum inside the hose and into the wall opening as far as you can safely reach. Then check the outside vent hood and make sure the flap opens freely and the opening is clear.
Once everything is clean and reconnected, run a short timed-dry test with an empty drum and feel the airflow at the outside vent. It should be strong and steady. If F4 E3 continues after all that, there may be an internal airflow or sensor issue that needs professional diagnosis.
F5 E1 / F5 E2 – Door Switch and Latch Problems
Your dryer wants to be absolutely sure the door is closed before it tumbles. F5 codes usually mean the control isn’t convinced the door switch or latch is working correctly.
How the problem shows up:
You press Start, the dryer beeps or flashes F5 E1 / F5 E2, and nothing happens. The drum light may stay on like the door is still open. Sometimes the door itself feels loose or pops open easily.
Likely reasons:
The door strike (the small piece that clicks into the latch) can be bent or worn. Lint or threads can build up inside the latch opening. The door switch behind the front panel can be out of position or damaged.
What you can check yourself:
Open the door and inspect the strike. It should be straight, solid, and properly aligned with the latch opening. Look inside the latch area for lint or broken plastic.
Close the door slowly and listen for a positive “click.” If there’s no click, or if it only closes when you slam it, the latch or switch is probably worn.
Replacing a door strike or latch is usually a straightforward, low-risk repair for someone handy, but replacing the switch itself means opening the front of the dryer, and many people prefer to have a technician handle that part.
F6, F9 And Other Advanced F# E# Codes
On some Amana dryers, you may see less common codes like F6 or certain F9 and F7x combinations. These often point to deeper communication problems between boards or more advanced internal errors.
For most homeowners, the realistic steps are limited:
First, do a full power reset by turning off the breaker or unplugging the dryer for several minutes. Then run a simple timed-dry test with an empty drum.
If the code does not return, it may have been a random electronic glitch. If it keeps coming back, especially right after startup, that’s usually a sign that the issue is inside the electronics and needs proper testing and diagnosis by a trained technician.
Simple Habits To Prevent Amana Dryer Error Codes
You can’t prevent every electronic failure, but you can dramatically reduce how often your Amana dryer throws F# E# codes by building a few easy habits into your laundry routine.
- Clean the lint screen before or after every single load.
- Have the vent duct professionally cleaned once a year, or more often if you dry a lot of heavy loads or have a long vent run.
- Keep the area around the dryer dry and well ventilated, especially near the console and control panel.
- Wipe the moisture sensor bars occasionally with a cloth and mild cleaner to remove softener and dryer sheet film.
- Avoid stuffing the drum completely full; moderate loads dry better and are easier on the motor and sensors.
- Close the dryer door firmly but gently, and don’t lean or sit on it.
When an Amana dryer error code does appear, use this guide as your translation tool. Match the F# E# code, read what it means in everyday language, check the most common causes, and try the safe DIY steps first. If the same code keeps returning after good cleaning, resets, and basic checks, that’s your sign it’s time to bring in a professional technician instead of guessing and throwing parts at the problem.